The titles on your website are key to making a clear and professional first impression. You can customize them to perfectly match your brand's style.
To edit your titles, log into your Hub and click on Edit Website (this will take you to your website editor).
From the editor menu, click on Pages. From there, click on Home and then select Header (the first section on the list). Then, choose Titles from the component menu.

Business Name
This is your official business name. It is important to note the difference between the Page Title and your Business Name:
- The Page Title is only visible on your website's header.
- Your Business Name is the official name used in your communications with customers (such as emails and invoices). For customers on our Plus Plan and Growth Plan, updating your Business Name here will also sync the change to your connected Google Business Profile.
Simply enter your official business name in the field provided.
Below that, you'll find the option to set the Title section Background Color (only available for the Origins, Modern, Neo, and Organic templates).
Find out how to update your websites Template here!
Use the color wheel to choose the right tone, brightness, and transparency. You can also input a specific HEX code if you want a particular color.

Page Title
This is the main title that appears prominently in your website's header. If you leave this blank, your Business Name will be displayed here by default. You can also choose to toggle the Title on or off.

- Text: Enter the title you want visitors to see.
- Alignment: Choose to align your title to the left, center, or right.
- Format: Choose if you want the text bold, italic, or all caps.
- Font Size: Use the slider to make your title larger or smaller.
- Letter Spacing: Adjust the horizontal space between characters.
- Line Spacing: Set the vertical space between lines of text.
- Font Color: Select a color that fits your website's theme.

Subtitle
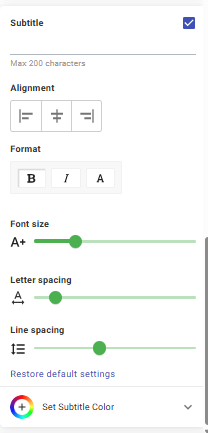
Add a smaller line of text underneath your Page Title for more context, like your tagline, slogan or a brief description. You can also toggle the subtitle on or off.
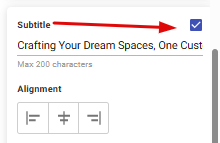
- Text: Enter the title you want visitors to see.
- Alignment: Choose to align your title to the left, center, or right.
- Format: Choose if you want the text bold, italic, or all caps.
- Font Size: Use the slider to make your title larger or smaller.
- Letter Spacing: Adjust the horizontal space between characters.
- Line Spacing: Set the vertical space between lines of text.
- Font Color: Select a color that fits your website's theme.
Well done! Make sure to save any changes you make, and they will update on your website immediately.
Need a hand?
If you need any further assistance, please message our support team or get real-time help on our Live Chat!